
Changing the app logo (also called the launcher icon) is an important step in branding your Flutter application. Whether you’re building your first Flutter app or preparing a production-ready project, a professional logo makes your app instantly recognizable.
I learned this lesson while building Flutter practice projects. I spent weeks perfecting the functionality but kept the default Flutter logo. Even though the apps worked well, they looked unfinished. Since then, changing the app icon is always one of my first branding steps—it’s a simple change that makes a huge visual difference.
Flutter doesn’t change the app icon automatically when you add an image to your project. You need to configure it properly for both Android and iOS. This guide explains the easiest and most recommended method using a Flutter package—the same method I use for every Flutter project at Deadloq.
Tip: Never keep the default Flutter logo. Even a simple custom icon dramatically improves how your app looks. I’ve built multiple Flutter projects, and custom icons always make the difference between “looks professional” and “looks like a practice project.”
Why Proper App Icons Matter
Before diving into the technical steps, understand why this matters for Flutter developers:
First Impression: Your app icon is often the first thing users see in the app store or on their home screen. A professional icon signals quality.
Brand Recognition: A unique icon helps users find your app quickly among dozens of others on their device.
Professional Appearance: Custom icons signal that your app is well-maintained and production-ready, not just a practice project.
Platform Standards: Each platform has specific size and format requirements. Android needs multiple density versions, while iOS requires numerous sizes for different contexts.
App Store Approval: Both Google Play Store and Apple App Store have strict icon requirements. Using the default Flutter logo can lead to rejection. According to Google Play’s app quality guidelines, proper branding assets including icons are essential for app approval.
When I built my Flutter calculator app and practiced with other Flutter projects, I found that adding a custom icon was one of the quickest ways to make the app feel complete and ready for real use.
Prerequisites
Before starting, make sure you have:
Flutter installed correctly – Check with flutter doctor. If you’re just getting started, follow our Installing Flutter on Windows guide.
VS Code set up for Flutter – With Flutter and Dart extensions installed. See our Creating Flutter Projects in VS Codetutorial for complete setup.
Your Flutter project already created – If you haven’t created a project yet, check out our Flutter Introduction and Core Concepts guide.
A logo image (PNG format) prepared with these specifications:
- Recommended size: 1024 × 1024 px (minimum)
- Format: PNG with transparency support
- Background: Transparent or solid color
- Design: Square, with important elements centered
Design Tips for Your Icon:
- Avoid fine details that disappear at small sizes
- Keep text minimal or none (text becomes unreadable)
- Test visibility on both light and dark backgrounds
- Use bold, recognizable shapes
- Ensure it looks good at 48×48 px (typical home screen size)
Step 1: Prepare Your App Logo
1. Create or Export Your Logo
Create a PNG image for your app icon with these specifications:
- Dimensions: 1024 × 1024 pixels (or larger, square ratio)
- Format: PNG
- Color Mode: RGB
- Background: Transparent (preferred) or solid
Tools you can use:
- Figma – Free, browser-based design tool
- Canva – Easy templates for app icons
- Adobe Illustrator – Professional vector graphics
- GIMP – Free Photoshop alternative
2. Name Your Icon File
Give it a simple, descriptive name:
app_icon.png
Naming best practices:
- Use lowercase
- No spaces (use underscores)
- Descriptive but short
- Avoid special characters
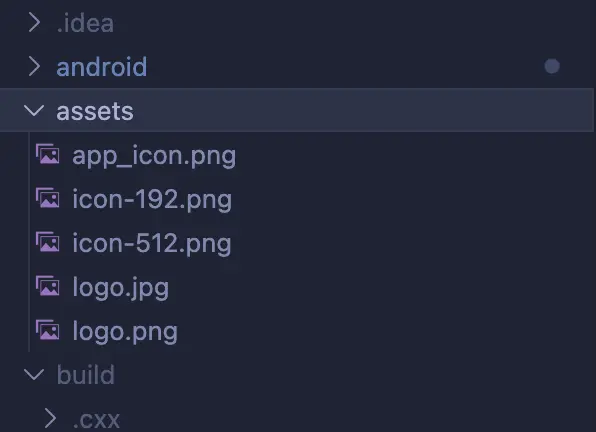
3. Create Project Folder Structure
Place the image inside your Flutter project in a dedicated folder:
project_name/
├── assets/
│    └── app_icon.png
├── lib/
├── pubspec.yaml
└── ...
Important: If the assets or icon folders don’t exist in your project, create them manually:
- Open your project in VS Code
- Right-click on the project root
- Select “New Folder”
- Name it
assets - Inside
assets, create another folder namedicon - Drag and drop your
app_icon.pnginto theiconfolder
Step 2: Add flutter_launcher_icons Package
The flutter_launcher_icons package automates icon generation for all required sizes across Android and iOS. This is the recommended approach because manual icon generation is tedious and error-prone. According to Flutter’s official documentation, using packages like this is the preferred method for managing app icons.
I use this package for every Flutter project because it saves hours of manual work and ensures I never miss a required icon size.
1. Open pubspec.yaml
In VS Code, locate and open pubspec.yaml in your project root.
2. Add the Package Under dev_dependencies
Find the dev_dependencies: section (or create it if it doesn’t exist) and add:
dev_dependencies:
  flutter_test:
    sdk: flutter
  flutter_launcher_icons: ^0.13.1
Important notes:
- Place it under
dev_dependencies, NOTdependencies - This is a development tool, not part of your production app
- Check pub.dev/packages/flutter_launcher_icons for the latest version
3. Add Configuration
At the bottom of your pubspec.yaml file (after all other content), add this configuration:
flutter_icons:
  android: true
  ios: true
  image_path: "assets/app_icon.png"
Complete pubspec.yaml example:
name: my_awesome_app
description: A new Flutter project.

dependencies:
  flutter:
    sdk: flutter

dev_dependencies:
  flutter_test:
    sdk: flutter
  flutter_launcher_icons: ^0.13.1

flutter:
  uses-material-design: true
  assets:
    - assets/icon/

# Icon configuration
flutter_icons:
  android: true
  ios: true
  image_path: "assets/app_icon.png"
Critical: YAML is extremely sensitive to indentation. Use 2 spaces for each indentation level, never tabs. Even one extra space can break everything.
Common YAML mistakes to avoid:
- Using tabs instead of spaces
- Inconsistent indentation
- Missing colons after keys
- Incorrect file path (check spelling and case)
Step 3: Get Packages
After modifying pubspec.yaml, you need to download the new package.
Option 1: Using VS Code Terminal
- Open the integrated terminal in VS Code (
Ctrl + ~orCmd + ~) - Make sure you’re in your project directory
- Run:
flutter pub get
Option 2: Using VS Code Command
- Save your
pubspec.yamlfile - VS Code should show a notification “Get Packages”
- Click it to automatically run
flutter pub get
What this command does:
- Downloads the
flutter_launcher_iconspackage - Updates your
pubspec.lockfile - Makes the package available for use
Expected output:
Running "flutter pub get" in my_awesome_app...
Resolving dependencies...
+ flutter_launcher_icons 0.13.1
Changed 1 dependency!
Step 4: Generate the App Icons
Now comes the magic—automatically generating all required icon sizes.
Run the Icon Generator
In your VS Code terminal, execute:
flutter pub run flutter_launcher_icons
What happens behind the scenes:
- Reads your
app_icon.pngfile - Generates multiple icon sizes for Android:
mipmap-mdpi(48×48)mipmap-hdpi(72×72)mipmap-xhdpi(96×96)mipmap-xxhdpi(144×144)mipmap-xxxhdpi(192×192)
- Generates iOS icon sizes:
Icon-App-20x20@2x.png(40×40)Icon-App-29x29@2x.png(58×58)Icon-App-40x40@2x.png(80×80)Icon-App-60x60@2x.png(120×120)Icon-App-60x60@3x.png(180×180)- And more…
- Updates configuration files automatically
Expected output:
════════════════════════════════════════════
     FLUTTER LAUNCHER ICONS (v0.13.1)
════════════════════════════════════════════

• Creating default icons Android
• Overwriting default iOS launcher icon with new icon

✓ Successfully generated launcher icons
✔ Success! The package has now:
- Generated Android launcher icons in
android/app/src/main/res/mipmap-*/ - Generated iOS app icons in
ios/Runner/Assets.xcassets/AppIcon.appiconset/ - Updated necessary configuration files

Step 5: Restart the App
The new icon won’t appear until you rebuild and reinstall the app.
1. Stop the Running App
If your app is currently running:
- Press
Ctrl + Cin the terminal, or - Click the red stop button in VS Code’s debug toolbar
2. Clean Build (Recommended)
To ensure a fresh build without cached files:
flutter clean
flutter pub get
3. Rebuild and Run
flutter run
Or use VS Code’s “Run and Debug” button (F5).
4. Check Your New Icon
You should now see the new app logo on:
- Android emulator/device: Home screen and app drawer
- iOS simulator/device: Home screen and app library
- App switcher: Recent apps view
Testing checklist:
- Icon appears on home screen
- Icon appears in app drawer/library
- Icon appears in recent apps
- Icon looks sharp, not blurry
- Icon is recognizable at small sizes
In my experience building Flutter apps, testing on actual devices reveals issues that emulators might hide, especially with icon clarity at different screen densities. I always test on at least one Android and one iOS device before considering the icon finalized.
Step 6: Platform-Specific Icons (Optional)
Sometimes you need different icons for Android and iOS, or you only want to update one platform.
Generate for Android Only
Update your flutter_icons configuration in pubspec.yaml:
flutter_icons:
  android: true
  ios: false
  image_path: "assets/app_icon.png"
Then run:
flutter pub run flutter_launcher_icons
Generate for iOS Only
flutter_icons:
  android: false
  ios: true
  image_path: "assets/app_icon.png"
Use Different Icons for Each Platform
flutter_icons:
  android: "assets/android_icon.png"
  ios: "assets/ios_icon.png"
This is useful when you need to follow platform-specific design guidelines.
Advanced Configuration Options
flutter_icons:
  android: true
  ios: true
  image_path: "assets/app_icon.png"

  # Optional: Remove alpha channel for Android
  remove_alpha_ios: true

  # Optional: Custom Android icon name
  android: "launcher_icon"

  # Optional: Add adaptive icons for Android
  adaptive_icon_background: "#FFFFFF"
  adaptive_icon_foreground: "assets/foreground.png"
Adaptive Icons (Android 8.0+): Modern Android devices support adaptive icons that can be shaped differently on different devices (circle, square, squircle, etc.).
Common Issues & Fixes
Issue 1: App Icon Not Changing
Symptoms:
- Old icon still appears after running the app
- Default Flutter icon persists
Solutions:
Solution A: Complete Uninstall and Reinstall
# Uninstall from device
flutter clean
flutter pub get
flutter run
Manually uninstall the app from your device/emulator, then reinstall.
Solution B: Clear Build Cache
flutter clean
cd android && ./gradlew clean && cd ..
flutter pub get
flutter run
Solution C: Hard Restart Device Sometimes the launcher cache needs a device restart to refresh.
Issue 2: iOS Icon Not Showing
Symptoms:
- Icon works on Android but not iOS
- iOS shows default icon or blank icon
Solutions:
- Clean iOS Build
cd ios
rm -rf Pods
rm Podfile.lock
pod install
cd ..
flutter clean
flutter run
2. Open in Xcode
- Navigate to
ios/Runner.xcworkspace - Open with Xcode
- Product → Clean Build Folder (Cmd + Shift + K)
- Product → Build (Cmd + B)
- Run from Xcode or VS Code
3. Verify Icon Assets
In Xcode:
- Open
Runner.xcworkspace - Click
Runnerin the left panel - Go to
Assets.xcassets→AppIcon - Check if all icon sizes are present
Issue 3: YAML Parsing Error
Symptoms:
Error on line X: mapping values are not allowed here
Solutions:
- Use exactly 2 spaces for indentation (never tabs)
- Ensure colons have a space after them:
android: true - Check file path is in quotes:
image_path: "assets/icon/app_icon.png" - Validate YAML structure: use an online YAML validator
Issue 4: Package Version Conflict
Symptoms:
Because every version of flutter_launcher_icons depends on...
Solutions:
flutter pub upgrade
flutter pub run flutter_launcher_icons
Or specify a compatible version in pubspec.yaml.
Issue 5: Permission Denied (macOS/Linux)
Symptoms:
Permission denied
Solution:
chmod +x ios/Pods/...
Or run terminal with appropriate permissions.
Issue 6: Icon Looks Blurry
Cause: Original image is too small or low resolution
Solution:
- Use at least 1024×1024 px
- Export as PNG at 100% quality
- Avoid upscaling small images
Best Practices for Flutter App Icons
Design Guidelines
1. Keep It Simple
- Icons are displayed at very small sizes (48×48 to 180×180)
- Complex details become invisible
- Focus on one central element
2. Avoid Text
- Text becomes unreadable at small sizes
- Use symbols and shapes instead
- Exception: Single letter logos can work
3. Use Appropriate Padding
- Don’t place critical elements at the edges
- Leave 10-15% padding around important content
- Platform shapes (circles, rounded squares) will crop edges
4. Test Visibility
- View at actual size (48×48 pixels)
- Test on both light and dark backgrounds
- Check visibility in app drawer and home screen
5. Follow Platform Guidelines
Android:
- Adaptive icons recommended (Android 8.0+)
- Use distinct foreground and background layers
- Avoid placing important content in the safe zone edges
iOS:
- Avoid transparency in icon background (use solid color)
- Rounded corners are added automatically
- No need to pre-round your icon corners
Technical Best Practices
1. File Format
- Always use PNG
- Maintain transparency where needed
- Use RGB color mode
2. Resolution
- Minimum: 1024×1024 px
- Preferred: 2048×2048 px or higher
- Always square (1:1 ratio)
3. File Size
- Keep under 1MB
- Optimize with tools like TinyPNG
- Balance quality and file size
4. Version Control
- Keep original high-resolution file (PSD, AI, Figma)
- Store in project repository
- Document any design changes
5. Testing
- Test on multiple devices
- Check both light and dark modes
- Verify in app stores before publishing
Advanced: Manual Icon Setup (Not Recommended)
While flutter_launcher_icons is the recommended approach, you can manually set icons if needed. This is tedious but gives you complete control.
Manual Android Setup
- Generate icon sizes using an online tool or image editor
- Place icons in:
android/app/src/main/res/mipmap-mdpi/ic_launcher.png(48×48)android/app/src/main/res/mipmap-hdpi/ic_launcher.png(72×72)android/app/src/main/res/mipmap-xhdpi/ic_launcher.png(96×96)android/app/src/main/res/mipmap-xxhdpi/ic_launcher.png(144×144)android/app/src/main/res/mipmap-xxxhdpi/ic_launcher.png(192×192)
- Update
android/app/src/main/AndroidManifest.xml:
<application
    android:icon="@mipmap/ic_launcher"
    ...>
Manual iOS Setup
- Generate all required icon sizes
- Open
ios/Runner.xcworkspacein Xcode - Navigate to
Assets.xcassets→AppIcon - Drag and drop each icon size to the corresponding slot
- Ensure all slots are filled
Why we don’t recommend manual setup:
- Extremely time-consuming
- Easy to make mistakes
- Must update manually for every change
- No automation benefits
Integrating with Your Flutter Development Workflow
Changing your app icon is just one part of building a complete Flutter app. Here’s how it fits into the bigger picture based on my development process at Deadloq:
Complete App Setup Checklist
Branding:
- Custom app icon (this tutorial)
- App name configuration
- Splash screen setup
- Brand colors and theme
Configuration:
- Package name/bundle ID
- Version numbers
- Permissions setup
- Platform-specific configurations
Quality:
- Error handling
- State management
- Testing (unit, widget, integration)
- Performance optimization
Related Deadloq Flutter Tutorials:
Getting Started:
- Installing Flutter on Windows – Complete Windows setup guide
- Flutter Introduction and Core Concepts – Start here if you’re new to Flutter
Essential Skills:
- Stateless vs Stateful Widgets – Understanding Flutter’s widget types
- Flutter Navigation and Routing – Moving between screens
- State Management with Provider – Managing app state effectively
Flutter Projects:
- Building a Flutter Calculator App – Complete beginner project walkthrough
- Flutter Beginner Projects – More hands-on practice apps
Best Practices:
- Flutter Mistakes to Avoid – Common pitfalls and solutions
- Flutter Best Practices – Writing clean, maintainable code
Other Development Topics:
- LaTeX for Professional Documentation – Document your Flutter projects professionally
Conclusion
Using flutter_launcher_icons is the fastest, safest, and most professional way to change your Flutter app logo in VS Code. With just a few commands, your app gets a branded, professional appearance that works perfectly on both Android and iOS.
After building multiple Flutter practice projects—from calculator apps to various experimental applications—I’ve found this method to be the most reliable. It’s the same approach I use for every Deadloq Flutter tutorial project, and it consistently delivers clean results.
What you learned:
- How to prepare app icon images correctly
- Installing and configuring
flutter_launcher_icons - Generating icons for both platforms automatically
- Troubleshooting common icon issues
- Best practices for app icon design
Key takeaways:
- Always use square PNG images at 1024×1024 or higher
- Let
flutter_launcher_iconshandle size generation - Test on real devices, not just emulators
- Clean and rebuild after icon changes
- Follow platform-specific design guidelines
With your custom icon in place, your app already looks more professional and ready for users. This small detail makes a huge difference in how people perceive your application’s quality.
Now go build something amazing with Flutter!
Quick Reference
One-Command Icon Setup:
# 1. Add to pubspec.yaml under dev_dependencies:
flutter_launcher_icons: ^0.13.1

# 2. Add at bottom of pubspec.yaml:
# flutter_icons:
#   android: true
#   ios: true
#   image_path: "assets/icon/app_icon.png"

# 3. Run these commands:
flutter pub get
flutter pub run flutter_launcher_icons
flutter clean
flutter run
Need Help?
- Drop a comment below—I read and respond to all of them
- Found an error? Let me know so I can fix it
- Built something cool? Share it!