Last updated: September 15, 2025
Author: Madaxe05 — Flutter developer with hands-on experience building production mobile apps.
Introduction
If you’re just starting Flutter development, VS Code is one of the easiest editors to use. In this guide, you’ll learn exactly how to create a new Flutter project in VS Code — step by step — with screenshots, real-world notes, and troubleshooting tips.
After following these steps, you’ll have a working Flutter starter app running on your emulator or device.
Step-by-Step: Create a New Flutter Project in VS Code
Step 1 — Install Prerequisites
Before creating a project, ensure these essential tools are installed:
- Flutter SDK – Download from flutter.dev
- VS Code – Available at code.visualstudio.com
- Dart & Flutter Extensions for VS Code
- Git (recommended for version control)
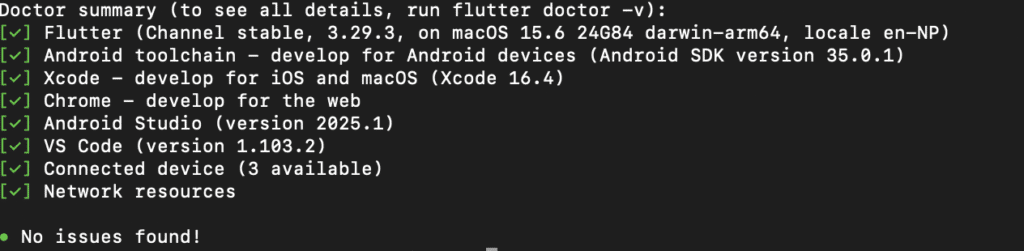
Verification: Next, run flutter doctor in your terminal to verify setup. This command checks for any missing dependencies and provides installation guidance.
Step 2 — Set Up Your Development Environment
For Android Development:
- First, install Android Studio (for Android SDK and emulator)
- Then, set up at least one Android Virtual Device (AVD) through Android Studio’s AVD Manager
For iOS Development (Mac only):
- Similarly, install Xcode from the Mac App Store
- Subsequently, launch Xcode and accept license agreements
- Note that the iOS Simulator comes bundled with Xcode
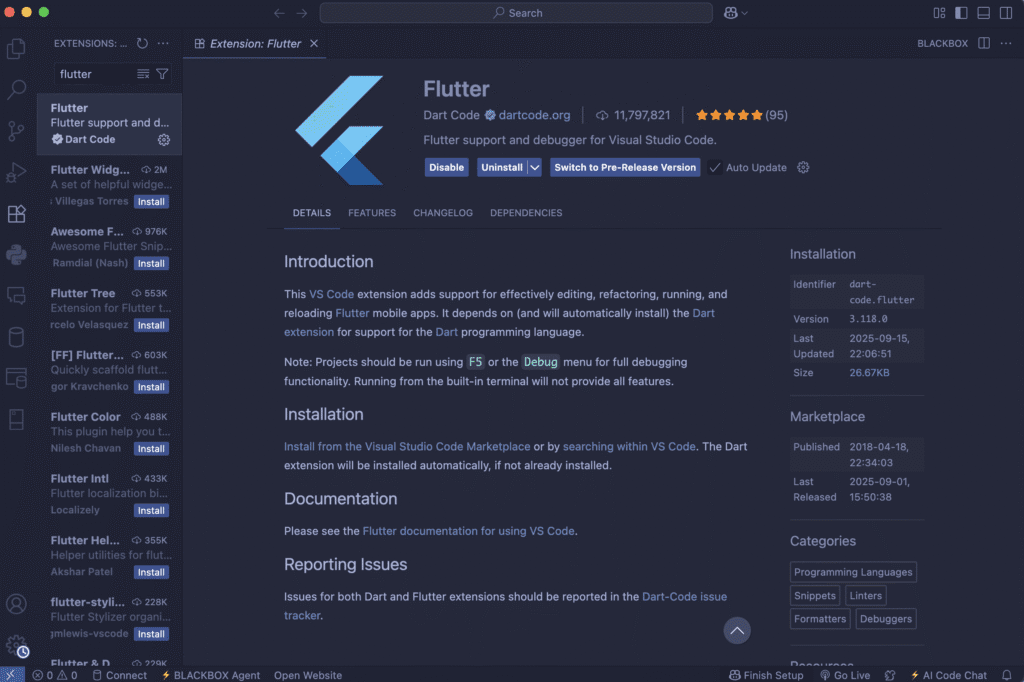
Step 3 — Open VS Code
Launch VS Code and confirm you see the Flutter icon on the left sidebar — that means the extension is active.
Alternative Method: You can also verify by opening the Command Palette and typing “Flutter” to see if Flutter commands appear.
Step 4 — Open Command Palette
- Press
Ctrl + Shift + P(Windows/Linux) orCmd + Shift + P(Mac) - This opens the Command Palette
Alternative Access: You can also access it via the Explorer panel by right-clicking in an empty workspace area.
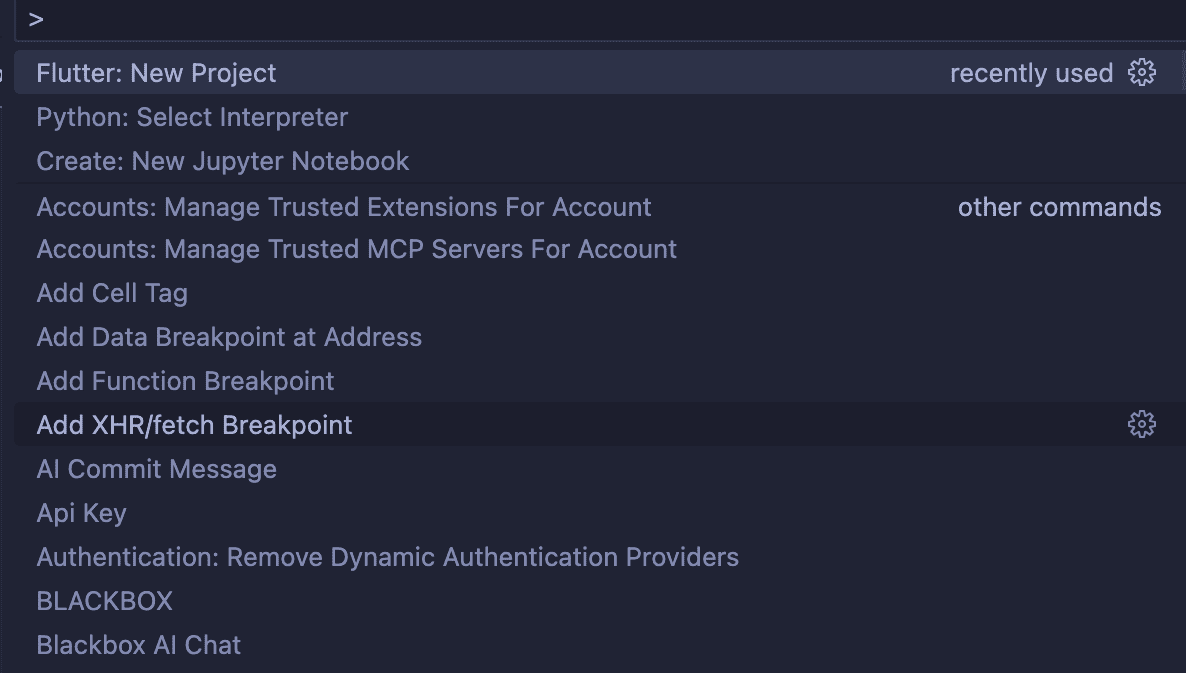
Step 5 — Select “Flutter: New Project”
- Type
Flutter: New Project - Hit Enter
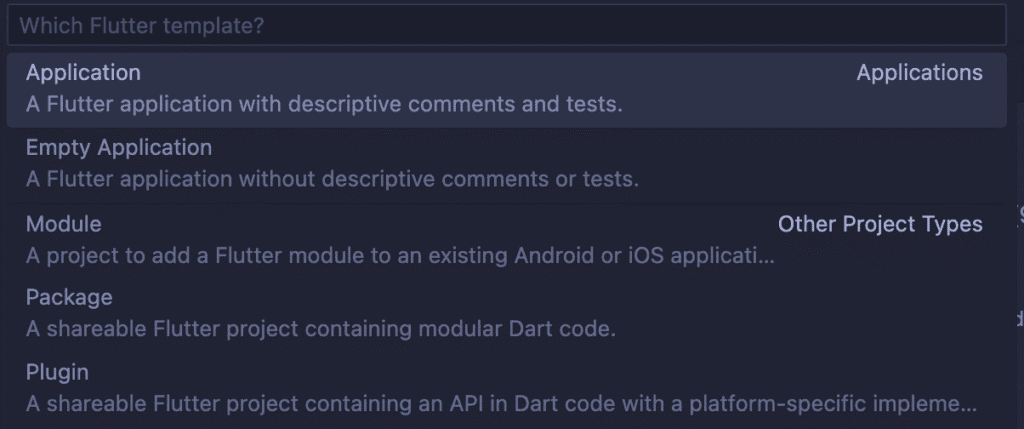
- Choose “Application” as the project type
Other Options Available:
- Package – For creating Flutter packages
- Plugin – For creating Flutter plugins
- Module – For adding Flutter to existing apps
- Skeleton – Generates a list view/detail view app
After selecting “Flutter:New Project”, select the ‘Application’ as shown below:
Step 6 — Choose Project Name and Location
- Enter a project name (use lowercase_with_underscores)
- Select a folder location to save the project
Important Naming Rules:
- Use only lowercase letters, numbers, and underscores
- No spaces, hyphens, or special characters
- Must start with a letter
- Examples:
my_first_app,todo_list,weather_app
Step 7 — Wait for Project Setup
During this process, VS Code will automatically:
- Create the Flutter project structure
- Install default dependencies (
flutter pub get) - Open
lib/main.dartfor immediate editing
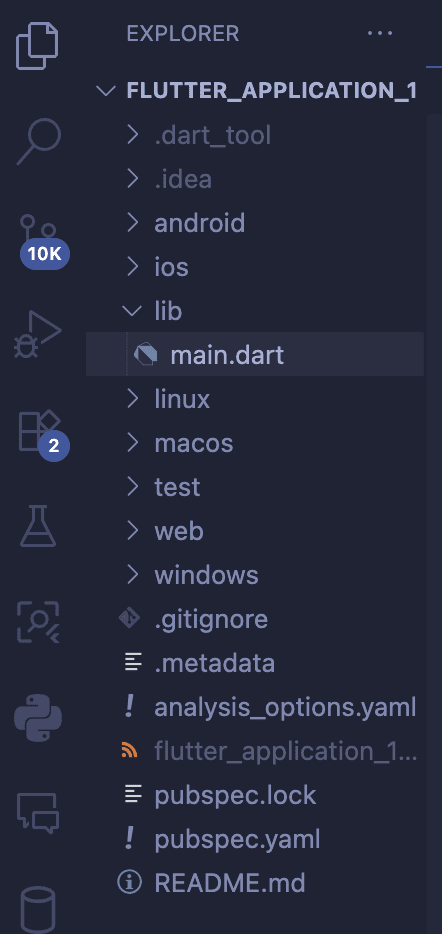
Project Structure Created:
my_flutter_app/
├── android/          # Android-specific files
├── ios/              # iOS-specific files
├── lib/              # Your Dart code goes here
│   └── main.dart     # App entry point
├── test/             # Unit and widget tests
├── web/              # Web-specific files
├── pubspec.yaml      # Dependencies and metadata
└── README.md         # Project documentation
You should see something like this :
Step 8 — Run Your New Project
- Connect a device or start an emulator:
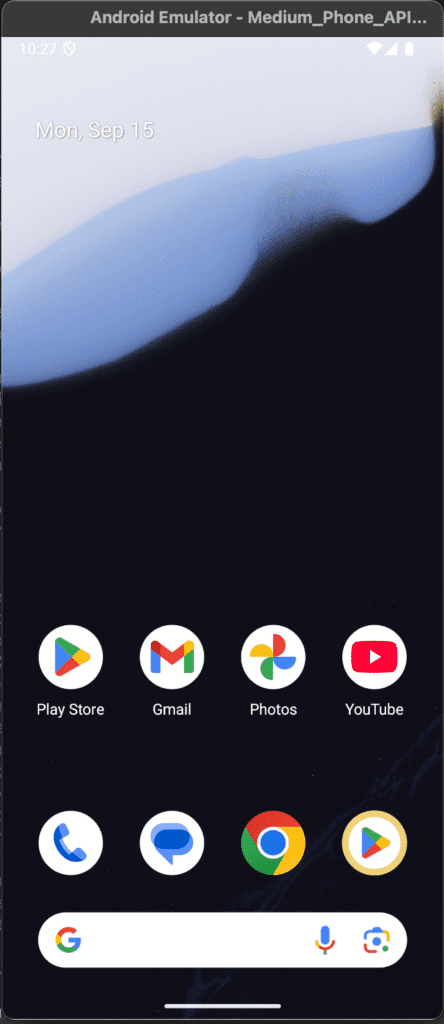
- For Android: Start AVD from Android Studio or alternatively use
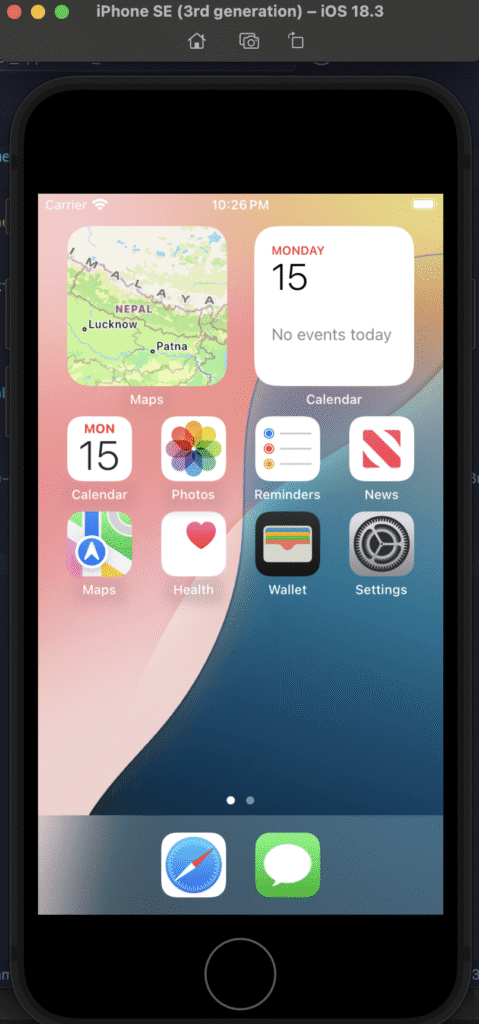
flutter emulators --launch <emulator_id> - For iOS: Open iOS Simulator from Xcode
- For physical devices: Enable developer mode and USB debugging
- For Android: Start AVD from Android Studio or alternatively use
- Select your target device in VS Code’s bottom-right status bar
- Run the app:
- Click Run button (or alternatively press
F5) - Or use Command Palette: “Flutter: Launch Emulator”
- Click Run button (or alternatively press
- Finally, the default counter app will launch successfully
So after clicking at the bottom right side of the VScode this will pop:
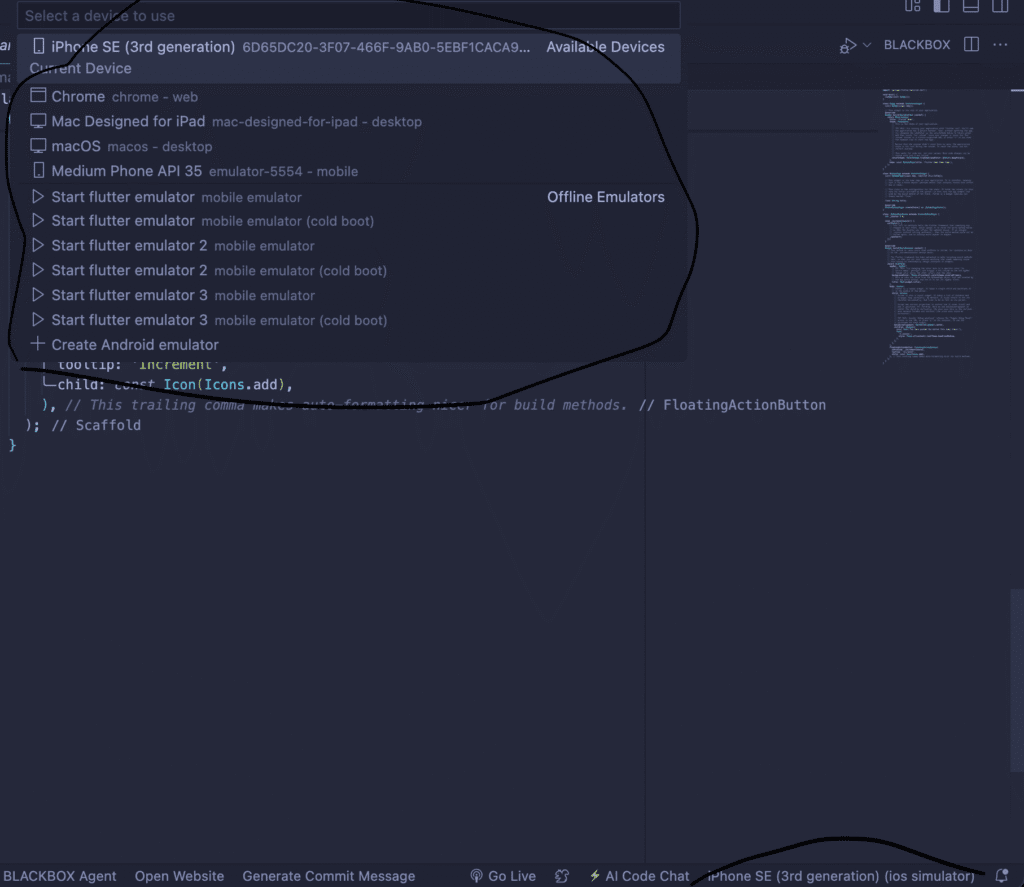
So these are the two devices that can be used after downloading Android Studio and iOS Simulator.
Step 9 — Test Hot Reload
- First, open
lib/main.dart - Next, change the app title from
'Flutter Demo Home Page'to'My First Flutter App' - Then, save the file (
Ctrl+S/Cmd+S) - Finally, watch the app update instantly without losing state!
Hot Reload Shortcuts:
Ctrl+S/Cmd+S– Trigger hot reload on saveCtrl+Shift+F5– Hot restart (resets app state)
Real-World Experience Tips
- Restart VS Code if the command palette doesn’t show Flutter options
- Run
flutter cleanif build fails, then subsequently runflutter pub get - Check
flutter doctoroutput for missing SDKs when encountering issues - Always use simple lowercase project names to avoid build errors
- Enable auto-save in VS Code for seamless hot reload experience
- Install useful extensions: Error Lens, Bracket Pair Colorizer, Flutter Tree
Common Troubleshooting
- Problem: “Flutter: New Project” not appearing
- Solution: Install Flutter and Dart extensions, restart VS Code, and ensure Flutter is in PATH
2. Problem: Build fails with SDK errors
- Solution: Run
flutter doctorand subsequently fix all issues listed
3. Problem: Emulator not detected
- Solution: Start emulator manually, then check device list with
flutter devices
4. Problem: Hot reload not working
- Solution: Ensure you’re saving files, and additionally check VS Code auto-save settings
Flutter Doctor should show this for flutter to run smoothly.
References (Authoritative Sources)
- Flutter Docs: Test Drive in VS Code
- Dart-Code Flutter Extension
- Flutter GitHub Repository
- VS Code Official Website
FAQs
Q: Do I need Android Studio to create a Flutter project in VS Code?
A: No. You only need the Flutter SDK and VS Code with the Flutter extension. However, Android Studio is recommended for Android SDK management and emulators.
Q: Why doesn’t the “Flutter: New Project” option appear?
A: Install the Flutter and Dart extensions, restart VS Code, and furthermore ensure Flutter is added to your PATH.
Q: Can I create a Flutter project from the terminal?
A: Yes. You can run flutter create my_app in your terminal, then subsequently open the folder in VS Code.
Q: What’s the difference between hot reload and hot restart?
A: Hot reload preserves app state and updates UI instantly. In contrast, hot restart resets the app state and rebuilds from scratch.
Q: Can I develop iOS apps on Windows/Linux?
A: You can write Flutter code on any platform, but building and testing iOS apps requires macOS with Xcode.
Quick Checklist
- [ ] Install Flutter SDK
- [ ] Install VS Code
- [ ] Add Dart & Flutter extensions
- [ ] Set up Android Studio/Xcode (optional but recommended)
- [ ] Run
flutter doctorand resolve issues - [ ] Create new Flutter project from Command Palette
- [ ] Run the default app on emulator/device
- [ ] Test hot reload functionality
Next Steps
Now that your Flutter project is ready, here’s what to do next:
- Explore the code: Study
lib/main.dartto understand the basic app structure - Try hot reload: Make changes and subsequently see instant updates
- Add dependencies: Learn to use
pubspec.yamlfor packages - Build widgets: Start creating your own UI components
- Learn debugging: Use VS Code’s debugging tools effectively
Continue learning: Additionally, check out the official Flutter documentation and Flutter Codelabs for hands-on tutorials.
For more content Visit Deadloq. Thank You!!